I love two-toned pedestal tables. I think they have an pretty, farmhouse look and are a lot brighter than most tables when they are painted white.
When I found this table on Craigslist for $50, the wheels in my brain started spinning with the transformation possibilities. I couldn't wait to refinish the top and try the famous Annie Sloan Chalk Paint out on the base.


Alan happily started sanding the top to get it ready to stain when he realized that unfortunately, it wasn't solid wood. We weren't going to be able to stain a broken veneer, so we were faced with roadblock number 1.
We could paint the whole table, but I really had my heart set on a two-toned look, so my awesome husband offered to build a new (solid wood) table top (my hero!). Alan has some experience building furniture (he built several desks in high school wood shop), so I was really excited to have him crank out something "custom" for me.
While he cut, glued, and sanded the table top, I had my own pieces of the project to complete. I found these chairs on Craigslist (from our trusty hotel liquidation salesman) for about $20 each. Again, I saw so much potential if they were painted and recovered, so I snagged six of them for our project.
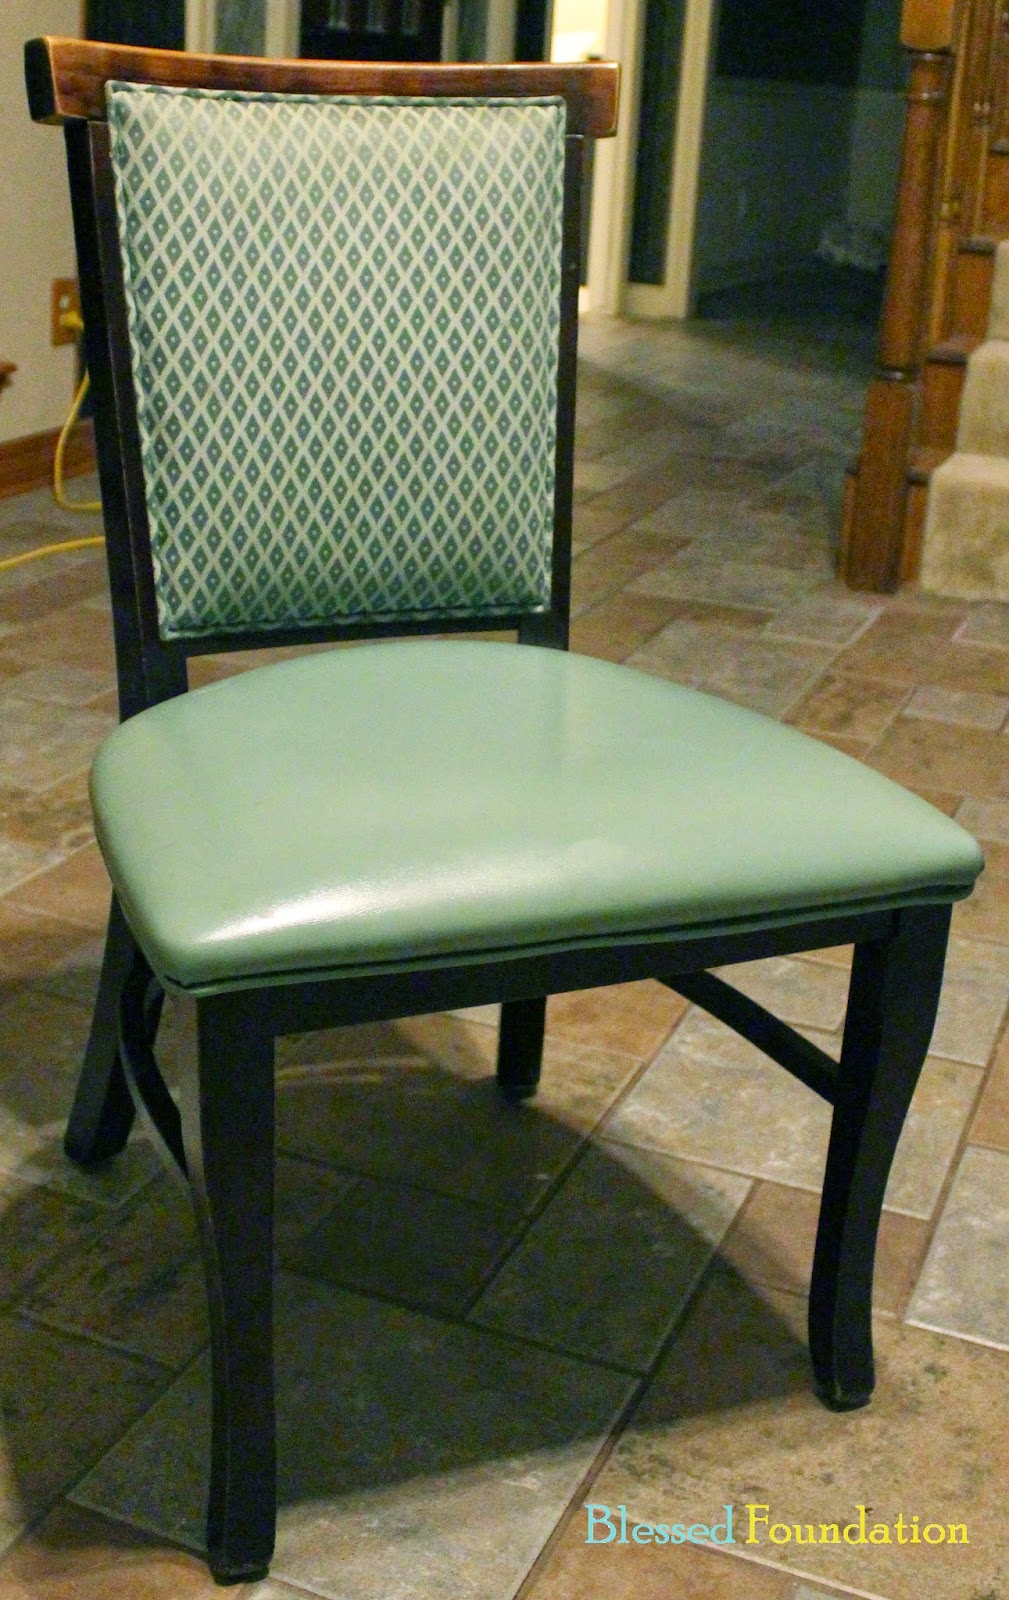
The seat of the chairs were pretty straightforward. After unscrewing them from the frame, I got to work pulling out staples. Then, I used the green fabric as a pattern for my new material and stapled the new material in its place.
Uncovering the back of the chairs was not as simple as I had hoped. I had to get a little messy and cut some of the fabric/padding off of the back rest, but I wasn't planning on recovering that part of the chair anyways.
When I ripped out the back rest of the chairs, it left a groove around the edge where the staples had held the fabric in place. This was roadblock number 2. Once again, my awesome husband came to the rescue. He bought some flat molding from Home Depot and cut it to accent the design of the chair. After a few staples and some wood filler, we were cooking with gas!
I picked up some Annie Sloan Old White Chalk Paint and white wax from
Multiplicity in Katy. They were really helpful and gave me a short tutorial on how to use the paint, the wax, and the brushes. When I got home, I got to work painting the chairs and was pretty pleased with how well they covered. (Remember, chalk paint means no sanding or prep prior to painting your furniture. Once I felt like painting, all I had to do was start!)

A little paint goes a long way, so I just dipped the tips of the brush in the paint and painted a small section of a chair.
The first coat was a little streaky, but it covered better than I expected after reading several other blog reviews.
After two coats, I was really pleased with the chairs and was ready to apply wax. (I waited about six hours between coats and that seemed to be plenty of time.)
The wax was a little more work than the paint. I think I got a good arm workout, but that made it less fun!
The wax brush is a little different than the paint brush. It has a hole in the middle of the bristles to make it easier to squish it up into corners or crannies of your furniture.
I dipped the ends of the brush in the wax, enough to get a small amount on the tips of the brush.
This next part took me a while to figure out how to describe, but the best word I can think of is "jabbing." Using the wax brush, I jabbed the wax into the surface of the chair in small sections. I tried to use circular motions when I could, but usually, it wasn't that graceful.
After I covered a small section with the wax, I went back with a rag and wiped it down.
After this dried (they say to wait overnight, but I waited just a few hours), the chairs were fully painted!
I took the newly covered seats and (taking some great advice from my mom) sprayed them with Scotch Guard before screwing them onto the chairs. Not even two days later, we had a spill on one of the chairs. I was so happy when it wiped right off like it never happened! (Picture of the finished chair at the end!)
Back to the table top. My mom came in town for a few days and was so great to help us sand and stain the table. After the top was stained (Minwax Dark Walnut), I painted and waxed the base, and then we went back with polyurethane over the top to finish it. (We did about three coats of satin polyurethane, sanding with high-grit sandpaper in between each coat. After the last coat, we went over the top with steel wool.)
The finished product makes my heart sing. I am so happy with how the table and chairs look and I really think they bring the room together!


