

Previously, I showed you how to take the fabric off a chair and how to reupholster all but the cushion. Click here to read more!
In this post, I am finishing out the tutorial by showing you how I recovered the chair cushion.
The cushion, in my opinion, was the very worst part. (I'm sorry, but I will complain through this whole section!) If I could do it over again, I would have taken a permanent marker and drawn around the top and bottom pieces where they came together with the cording before ripping the pieces apart. Then, it would have been much easier to know where to sew the edges together. But, I'm done now and I don't have to think about that anymore, so if you want to try this and tell me if it was a good idea, let me know!

I took off the cushion and ripped it apart at the seams. This left me with a top piece, a bottom piece, two cording pieces, and the ring around the side. The side piece, once taken apart, was made up of one long rectangular piece, a zipper, and two pieces that ran alongside each side of the zipper.

I used my iron a LOT during this part to make sure that all of the seams were creased. This made sewing much easier.

First, I ironed a crease in the two pieces that would run along the zipper and pinned them each in place next to the zipper. Still using my zipper foot, I sewed down each side, removing pins as I went.

Here's what it looked like after the zipper was sewn in place:

I made the mistake of pulling my zipper slider all the way off and had a mild heart attack. Then, I remembered that I had just upholstered most of a chair and so I gave myself a pep talk that I was smart and able to do pretty much anything at this point. (Maybe a little dramatic, but a project like this can make you feel a little crazy and it's what I needed at that point.)

After pulling one end of the zipper apart, I thread the slider onto one side.
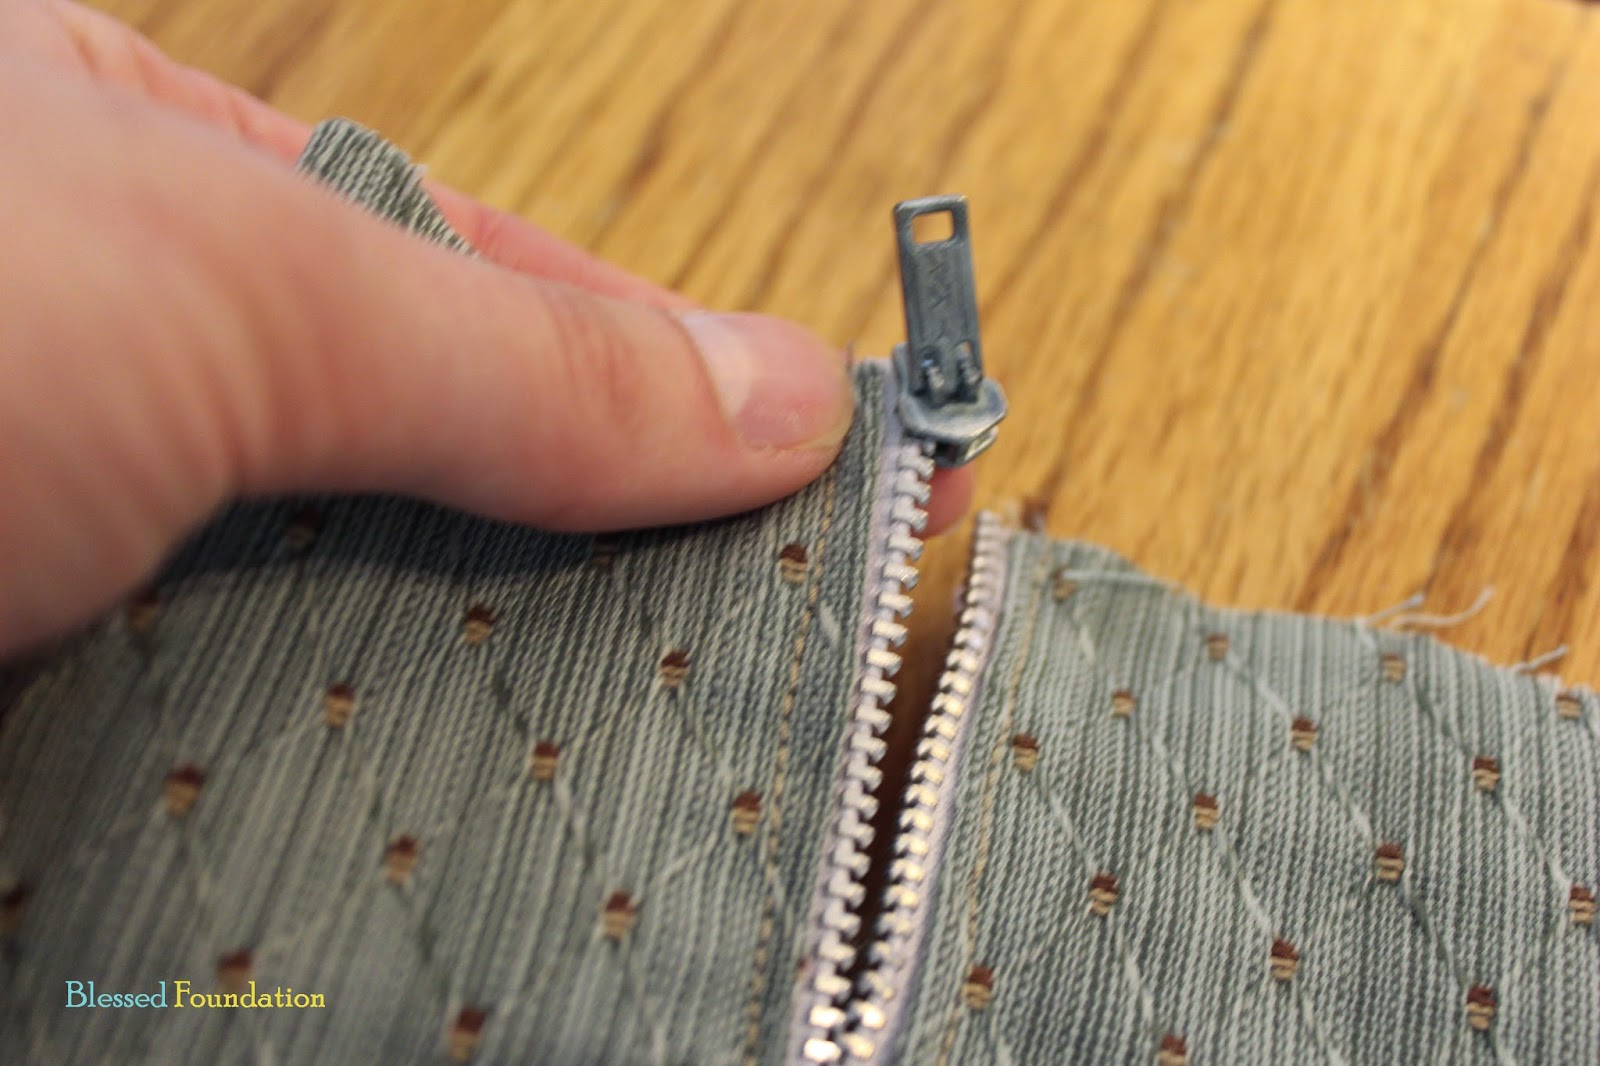
Then, I thread it onto the other side and pulled it down the row.

I won't kid you and tell you I didn't just pull it right off again... I did. Twice. But that thing wasn't going to get me again. I used a pin to keep it from going past the end of the chain.

Next, I pinned the long, rectangular piece to the zipper piece of the cushion cover.


Then, I sewed a straight line to keep the two pieces together. (I sewed right over the zipper chain with no problems, but I'm not sure if I should have taken any precaution to protect my machine.)

Here's what it looked like after it was sewn:

The next order of business was to sew the cording in both sides of the edge piece. I started by ironing the creases where the cording would go.

Then, I placed the cording in the creased edges...


...and pinned it into place.


I repeated this on the other side.


Using the zipper foot, I sewed down both edges of cording to secure them in place, removing pins as I went.

Sewing slowly worked best for me. This helped me make sure that I was staying close to the cording.


Do the same for both sides.

Once the edge piece was sewn, I just needed to complete the loop by sewing it together on both ends.

This is what it looked like at the seam:

I laid one side of the cushion cover on top of the foam and fit the edge piece around so that I could gauge how to pin them both together.

I started pinning around the edge of both pieces, placing the pin just outside of the cording.


After all was pinned in place, I slowly sewed around the edge of the cording to bind both pieces.

Next, I did the same thing with the other side of the cushion cover.

This time, I had to make sure the zipper was open so that I could remove the cover without taking out any of the pins.


Again, I slowly sewed around the edge of the cording. This was the hardest part of the whole project because I had to keep so much fabric out of the way and sew on the wrong side of the fabric where I couldn't see the cording. Slow and steady...


I was done!

Alan and I picked out some nicer furniture legs that he stained and finished.
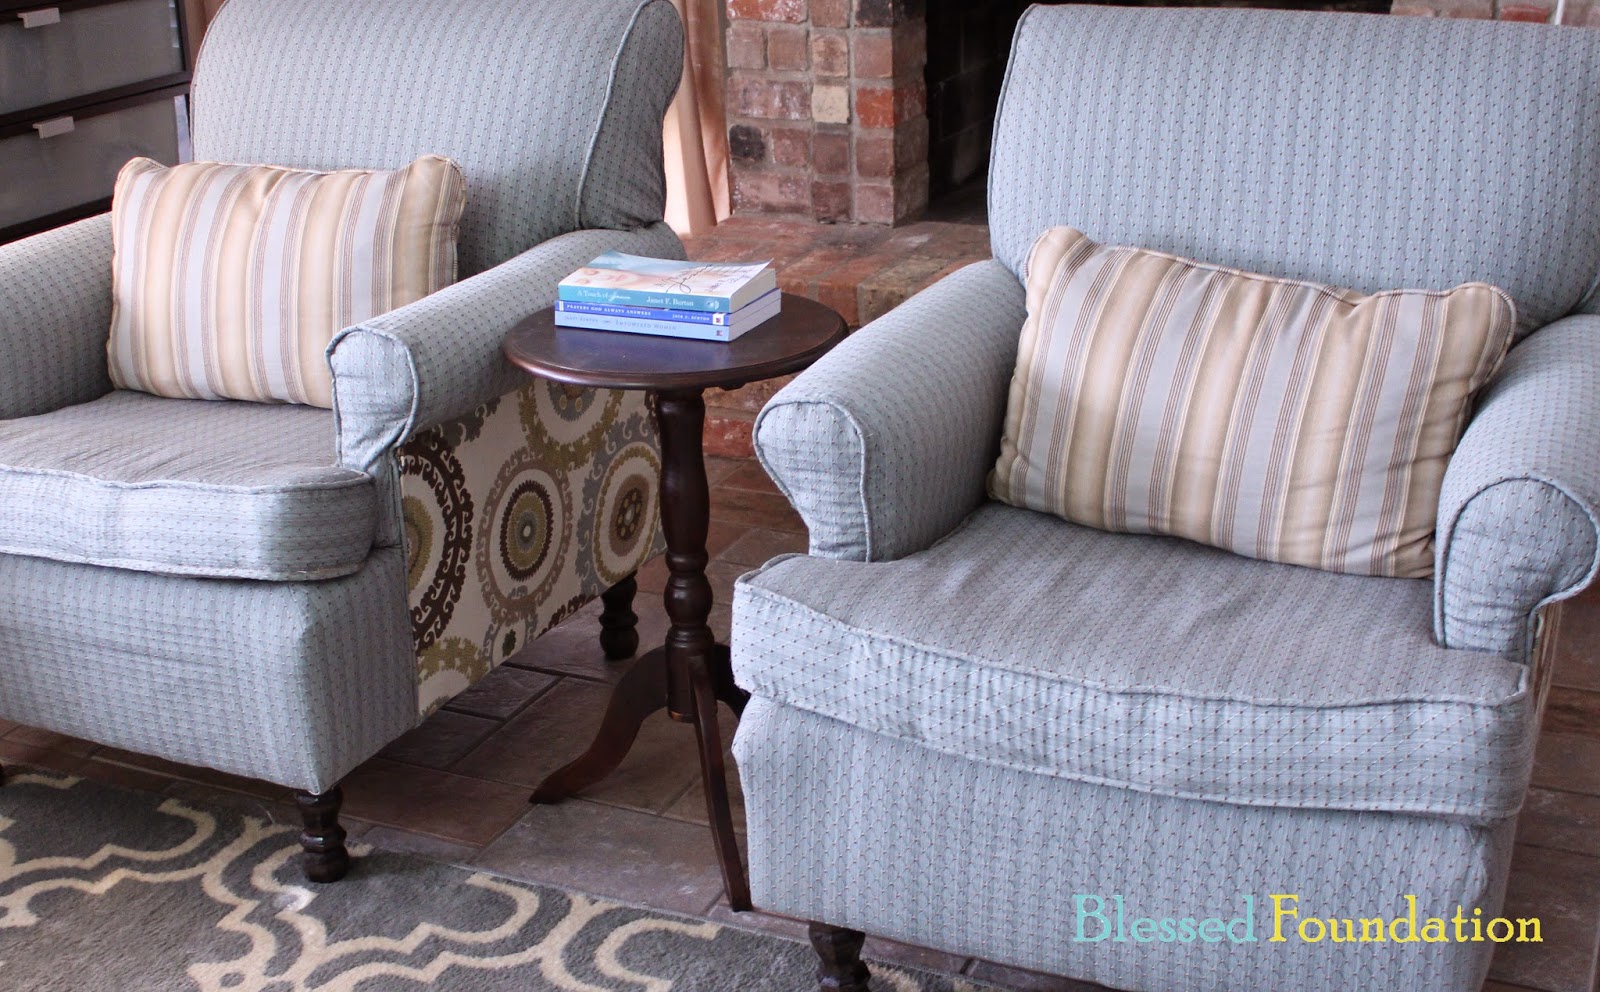
After attaching the new legs, we were FINALLY done with our living room chairs. I am SO happy with how they turned out. After this project, I feel like I can do anything. Climb a mountain! Win an Oscar! Cure a disease!


Or take a nap. Yawn... looks like some of our friends have already claimed their spots.


We are thrilled to have our living room chairs finished. It's time to move on to the next project, but just for now, I think we'll sit a while.
When you're ready, visit our post about our game room paint job here!