Wednesday, April 16, 2014

Post 12: Kitchen Updates - Cooktop

Cooktop

We found a downdraft cooktop on Craigslist (where else?) for a steal.

No, it was not stolen.  But it was a great deal.  It was brand new, but the owners who moved in to the house where it had been installed brought a different cooktop with them that they wanted to use.  We bought the new one from the contractor for a fraction of the price and it works great!  

Below is a little peak at the cooktop switch project:

Our old cooktop worked fine, but we wanted something a little less worn and more up-to-date!


After we cleared out the cabinet, Alan was able to push the cooktop right out to make room for the new one.

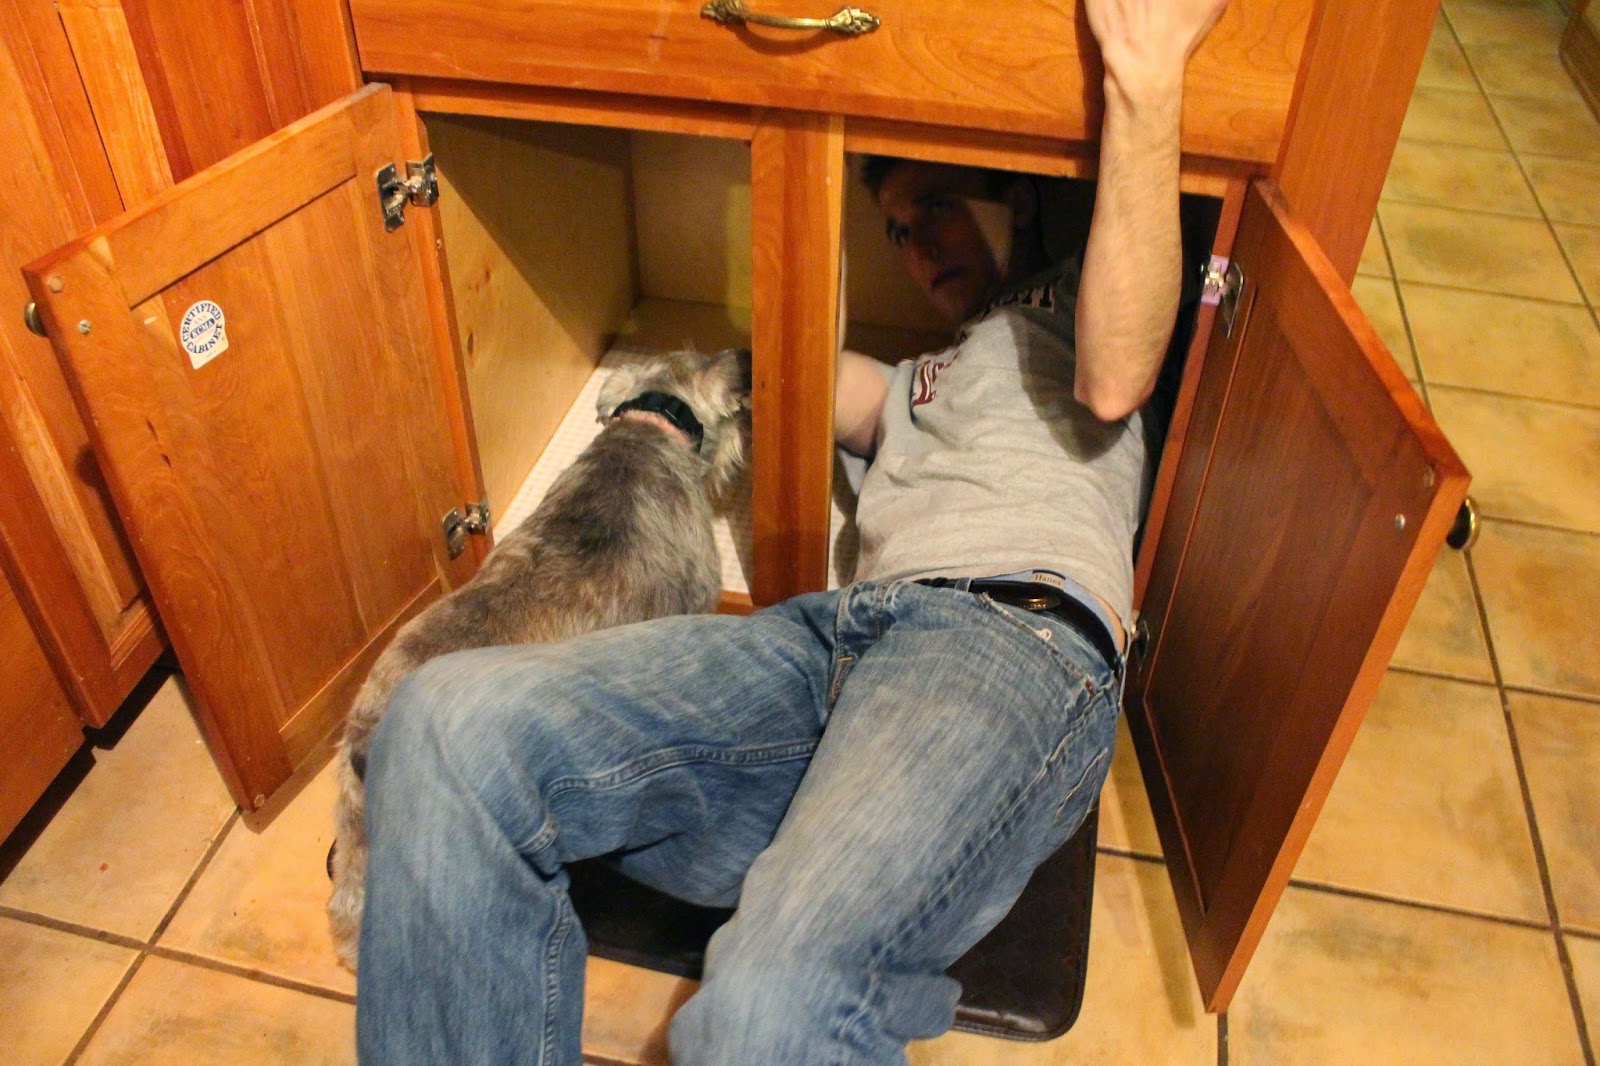
Lucy was a big help! ;)
I promise I helped him get it out, but someone had to take a picture!!


Here is a picture of the hole where the cooktop sat.  


Unfortunately, even though we measured before we bought it, the new cooktop was just slightly bigger than the old one.  The counter tops are granite, so I wasn't quite sure if we were just going to be out the money we spend on the new cooktop.  Not to worry -- Alan bought a diamond blade for his skill saw and opened up the hole in the granite just enough for the new cooktop to fit in.

*Warning* This will be really loud and produce a TON of dust.  We are about three weeks out of this project and I am just now not having to dust everyday.  Some good advise I've been given is to keep doors and windows open during projects like this, change the air filters in the house right after the project, and place an air purifier in the room near where the project occurred.  I have some advise as well.  My advise, though, is the most important of all of these tips, so listen up: Get your advise BEFORE you start this project!!  Some of these precautions would have saved me a lot of trouble cleaning, re-cleaning, and cleaning again!

Good news is that after all of the noise and dust, the new cooktop fit right in (okay, there were several tries and cuts made before it fit, but it finally did sit snugly in the space)!


Here's a look at the transformation:

Before:


After:


Now, I know we still have the vent hood above the stove.  That's because we haven't installed the vent under the cabinets yet for the new system.

That's another project for another day!

For now, we're moving on to our dining room.   Click here to read about our first total room makeover!

Friday, April 4, 2014

Post 11: Kitchen Updates - Microwave

When we first looked at our house, we knew the kitchen had some great potential.  

"Potential."  

Meaning, it needed some work.


The cabinets are custom and beautiful, but there isn't a whole lot else that we love about our kitchen.


We know that a lot of work has probably already gone into this room and we are so blessed to have all of the cabinet space and appliances.  BUT, we still have some big plans for the space and wanted to share a few of them.

In this corner of the kitchen, we want to open up the room to the eating area where Alan is standing. ;)


Plans are to install a microwave drawer (there was no microwave in the kitchen), change out the stove for a downdraft model, and remove the cabinets between the kitchen and the eating area so that both areas flow together.  If you're a visual person, check out my awesome drawing:


We know this is a lot of work and there are a lot of things that may not turn out exactly as we envision, but we'll learn as we go and get advise before we start something we can't reverse!  I think we'll be able to come close to what we're picturing, though. =]

So, let's start from the beginning, shall we?  The microwave.

Microwave

We found this cool microwave drawer on sale for a great deal at the Home Depot and snatched it up.  There were some drawers in our kitchen that we decided we could sacrifice to make space for a built-in appliance.  Unfortunately, we didn't know the first thing about installing a microwave, so it just sat in our garage for several months.


Living in a project house means that many nights, we rush home from work only to begin work on some part of the house.  There's not always the time (or need) to cook a huge fancy meal for dinner (and thankfully, my husband doesn't demand this), so we go for what's fast.  In my book, that usually means heating something up in the microwave.

We has been relying on one of these old microwaves for several months to get us through.  Now, at first glance, this may not look too bad, but you need to know that this is a microwave I bought for my freshman year in college, so it is several years old and only 700 watts.  It worked fine for most things, but  it had some age and wear that caused a few issues in cooking.  (We never could really figure out how to make it pop popcorn!)


After a few too many cold or partially cooked meals, we decided it was time to bite the bullet and figure out how to get the microwave drawer installed.

Fortunately, the day of the install, Alan's mom stopped by to say hello and in doing so, saved us from ourselves.  We told her our plans to put in the appliance (which was along the lines of "that's where we're going to put it") and she had the bright idea to call in some professional support.  

Apparantly, Alan's Uncle Jimmy used to do cabinet work -- how did we not know this?  We called him up and he graciously drove on over to help us out.  Thank goodness he did, because it turned out to be a big ordeal!  They had to cut the cabinets, put in a shelf to hold the microwave, and piece some of the cabinet front back together beneath the microwave without showing the cuts or nails.

I wish I had taken pictures throughout the project, but it was a big commotion to get the microwave installed in the cabinets, so I mostly tried to stay out of the way.

Thanks to Uncle Jimmy and Alan, we got our microwave.  I think it is perfect for this kitchen!  (And just for grins, I got a picture of the old microwave so you can see the difference!)

Before:

Sorry for the finger in the picture!

After:


I love it!  Family is great -- thanks Uncle Jimmy!

Here, we share about our cooktop project!!