Thursday, August 6, 2015

Post 34: Kitchen Demolition -- Furdowns

Demolition day is here, y'all!  This project is getting real... and fast!  Today we are showing you how we took down our cabinets and removed our furdowns to start creating a more open-concept kitchen.

If you need a refresher, these are some of our plans:
  • Removing all furdowns
  • Raising the cabinets on the wall
  • Opening up the bar for more "open concept" flow
We'd like to move the cabinets up on the wall.  A lot of our stuff (coffee machine, bread basket) don't open all of the way unless you pull them out from underneath the cabinet.  (Also, I can't get utensils out of my crock without hitting the bottom of the upper cabinets!)  We measured several other people's kitchen cabinets and found that ours are about four inches lower than theirs.  Since we wanted to get rid of the furdowns anyways, we thought this was the perfect time to raise the cabinet height.

Here is a reminder of our plans for a more open concept bar area.  (The X'd out area shows what we want to get rid of!)


All refreshed?  Here we go!

Removing Cabinets

In order to get the furdowns off the wall and move the cabinets up a few inches, we needed to unscrew the cabinets from the wall.  I started by removing all of the knobs and pulls from the cabinet doors.


Then, I unloaded the cabinets.  We will be "kitchening" out of our dining room until further notice...  (Anyone up for takeout?)


Finally, we removed all of the doors from the kitchen cabinets.  (This was partially to avoid annoying doors hitting us while we took the cabinets down and partially because we plan on painting them later.)


To keep track of the doors, I made a floorplan and numbered the cabinets with painter's tape.  I'll show you in another post how we numbered the cabinets without painting over them!


With the cabinets unloaded and the doors removed, we were almost ready to take the upper cabinet boxes off the wall.  First, we decided to remove the crown molding since some of it went out past the cabinet box.  See exhibit A.


The molding came off pretty easily with a crowbar and a hammer.


I was careful to label all of the pieces so that we would be sure where they went when we put everything back together.  (I know -- the dust is gross!)


To remove the boxes from the wall, we found the screws at the top/back and lower/back of the cabinet, unscrewed them, and brought the them down.


To bring down the cabinets over the stove, we had to unscrew the vent hood.  (I know you can't tell by this picture, but I really was so excited!  This was going to open up the room so much!)


For boxes we wanted to take down separately, we just unscrewed them from each other at the front sides.


Removing Furdowns

Once the cabinets were off of the wall, it was time to get the furdowns out of the way.

Say... what's a furdown?

Funny you should ask!  I created my own definition on our last project (our half bath).

Furdown: noun /fər-doun/: a section of the ceiling that is dropped lower than the rest of the ceiling, typically to house duct work or fill the gap between the ceiling and cabinetry; similar to soffit.

Here are the furdowns in our kitchen:


The last time we tore out a furdown, we just used a hammer and a crowbar.  After that experience, we decided the right tool was a reciprocating saw, so we invested in one for this project.


To start, we made holes in the drywall with a hammer and pulled down the drywall to see what was behind it.  We didn't want to start sawing into electrical or plumbing by mistake!


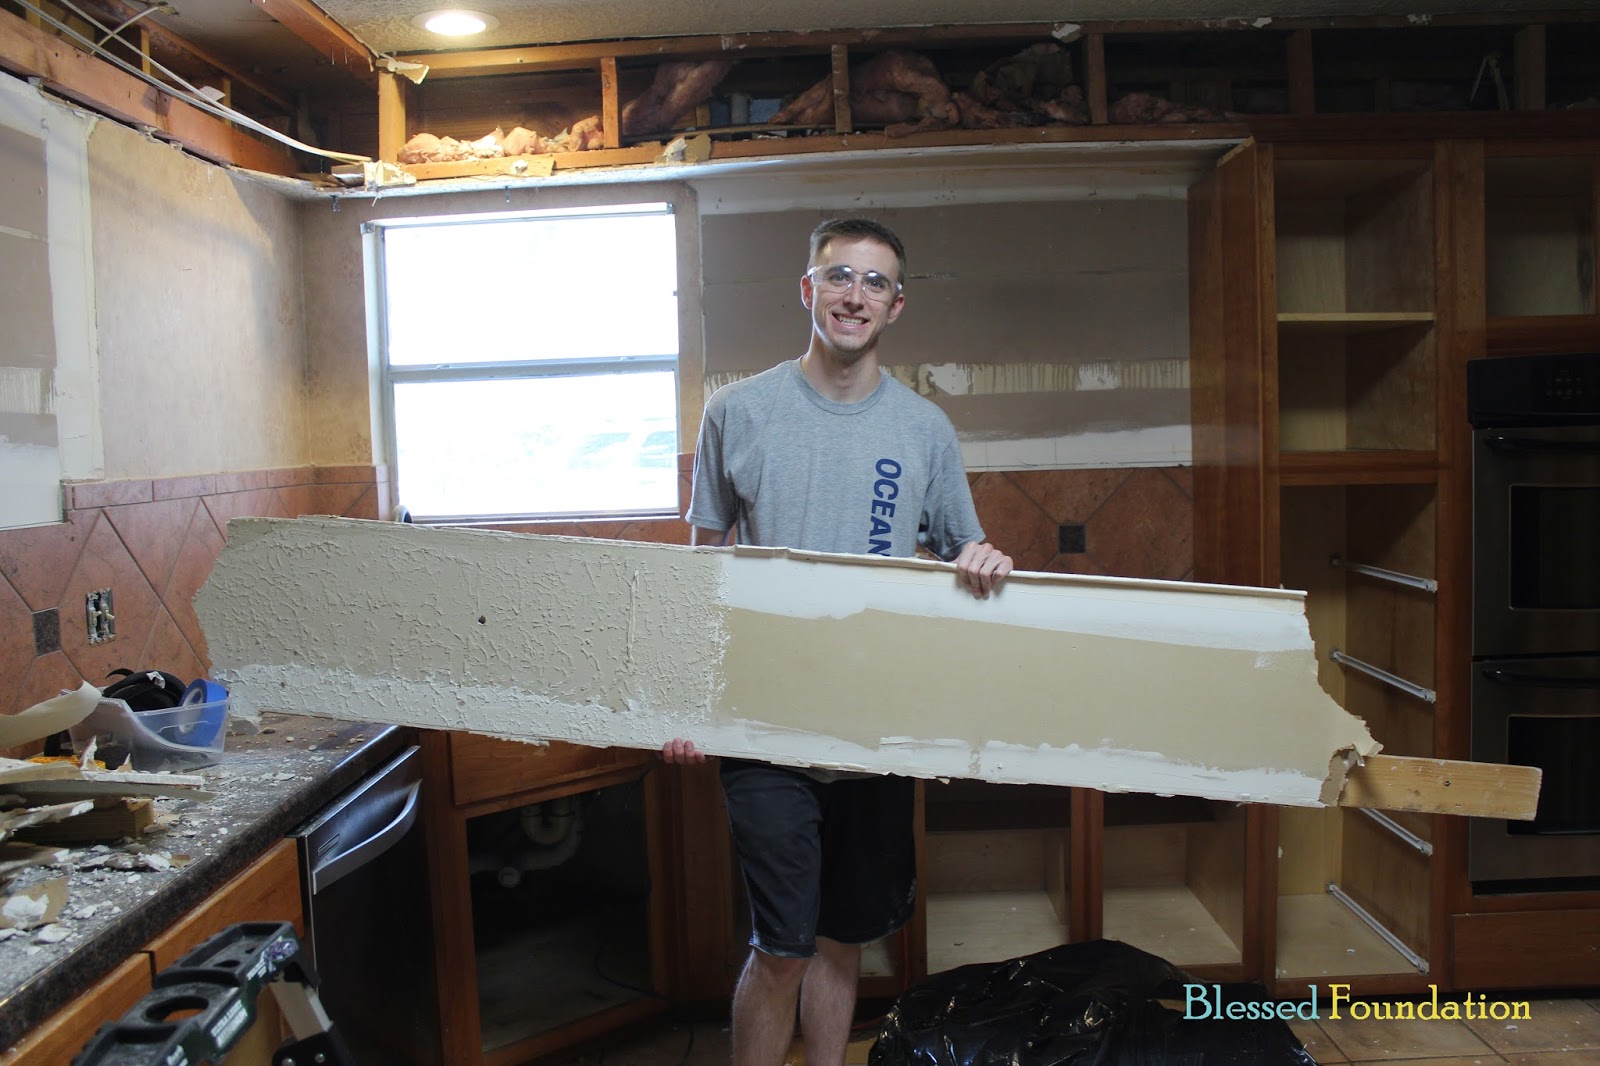
With the drywall down and everything exposed, we were able to see where there was electrical that would would need to work around.  Using the reciprocating saw, Alan broke the framework into smaller pieces to pull it down off the wall.


Well... mostly smaller pieces...

With the furdowns removed, our place was a mess!

Fun fact: this was trash day and our trash cans were at the curb waiting to be emptied, so we had to wait to throw all this junk away.  AH!


I think when we heard the trash guys come, I ran to get the bins!

So, the kitchen furdowns are off the wall and the trash if off the floor (and counters and sink)!

Just when we felt like we were on a roll, we opened up the furdown over the windows in our breakfast nook.


Unfortunately, it looked like the beam in the wall was load-bearing, so we decided to cover it back up (rather than possibly pay a bunch of money to get it moved).  So, a slight bummer, but the next part is so good that I don't even care!


Removing the wall

Removing the wall was the best part of the demo in my opinion.  This is what we wanted to open up so that we could extend the bar and have a more open-concept feel to the room.


The wall was similar to the furdowns.  We took the drywall down and then used the reciprocating saw to help remove the framework.  I feel like it REALLY opened up the room.  Not only will we be able to see whoever is sitting at the table, but we can also see out into the back yard!

And... this is our kitchen! TA-DA!!!


Actually, I think YIKES is more like it!!  We've really gotten ourselves into something...  But don't worry.  I have faith that we can get it all back together.  Visit us soon to see how we hide all those pesky wires!

And hey, as my treat to you, I'll leave you with this.  If you're ever feeling bad about your messy house, just remember -- there once was a day when it looked like this at the Sulak's.  You're welcome.

Thursday, July 30, 2015

Post 33: Stove vent

Last week, we showed you our plans for a kitchen renovation.  Today, we're going over one of the first steps we took to make that happen!

We updated our stove top shortly after we moved in to our house.  We wanted to go for something with stainless steel on it to match the rest of our appliances, but we also were interested in a downdraft stove.  (That means the stove pulls the smoke and steam downwards instead of up into a vent hood.)  Click here to see that installation project.


Our reason for installing a downdraft cooktop was so we could remove the vent hood and open up that wall of cabinets to the breakfast area, creating a more open-concept feel.  Here is a picture with our plan to remove the dividing wall and cabinets:


Before we start removing the vent hood and tearing out the wall, though, we need to vent the stove out of the house.  (Right now, the stove vent will pull steam down, but there's not place for the steam to go except into the cabinet -- not good!  We have to install ducting that will lead the steam out  of the house.)  

Currently, the cabinet (and the bottom of the cooktop) looks like this:


Our vent will need to turn a 90-degree corner and then go straight through our cabinets and out of the house.  Below is an overview of the cabinetry and where the ducting will need to go.

Here's what we needed to get the project done:
  • 6 inch hole saw
  • Drill
  • Drill Bits
  • 6 inch elbow duct
  • Pencil
  • Measuring Tape
  • Hole Saw Arbor
  • Hole Saw Extension
  • 6 inch x 5 foot metal duct pipe
  • Duct clamps
  • Damper wall vent
  • Hammer
  • Jigsaw
  • 6 inch x 5 foot metal duct pipe
  • Duct clamps
  • Damper wall vent
  • Hammer
  • Reciprocating Saw (or Jigsaw if you don't have one)
  • Dremmel


Once we had our supplies, we were ready to get started!

Step 1: Fit the elbow to the downdraft.

We did this so that we would be able to see how all of the ducting will line up within the cabinet.


Step 2: Measure where to cut the first hole.

Alan measured how far the elbow sat from the back and top of the cabinet and then marked this on the side of the cabinet where we would need to cut the hole.


Step 3: Cut the holes.

This step was the hardest part of the whole project.  It took the most time and was the most difficult (physically).

We started by drilling a pilot hole through the first cabinet wall in the middle of where the 6-inch hole would be drilled.  Below are a picture of the bit we used and where we drilled through the cabinet.


Next, Alan attached the hole saw to the drill and lined up the arbor with the pilot hole.  I will just be frank and say that this part was awful.  We didn't realize it, but there is a lot of torque/force going on when you use a hole saw, and drilling through a cabinet is extremely difficult.  Alan made the cut, but it took a lot of work I was a little scared for his fingers...  (He was very safe, but the torque made the drill rotate and hit the side of the cabinets and his hands were in between -- no fun!)


To get through the second piece of cabinet wall, Alan decided to use a hole saw extension.  This gave him more room to grip the drill while he made the cut.


The first full hole was cut, giving us an idea of how to line up the next hole that would go through the exterior wall.


The next hole that would go through the outer wall was on a corner.  We weren't sure exactly how to measure and line this hole up since it was on an angle.  Using the hole saw was so difficult already, but cutting with only one side of the saw touching the cabinet would have been nearly impossible.


We decided to cut it straight on and then widen the hole from there.

Alan drilled the pilot hole and started to drill using the hole saw, but progress was SO SLOW!!  We decided to drill more holes and work it out without the hole saw.


We ended up going in with a jigsaw to get most of the wood out and then using a hammer to knock the remaining pieces away.  (Halfway through this project, we bought a reciprocating saw and decided that was a little easier to use than the jigsaw.  We switched to that pretty quickly.)


Once the main part of the hole was drilled, we went back and used the ducting to see how much more we would need to cut out.  Fortunately, we had some extra ducting, so Alan cut down a piece to fit through the cabinet (from the right side) and we were able to draw where the hole would need to be.


We had lots of help from Gus on this project! ;)


Using the drill to make pilot holes and the reciprocating saw to do the rest, we cut out the rest of the hole in the cabinet to accommodate the ducting.


The next step was to cut through the exterior wall.  We used the small ducting to line up the hole again and then drilled a pilot hole all the way through the wall.  Here's a picture of where it came out on the outside of the house.


With the pilot hole drilled, Alan was able to line up his hole saw to drill through the wall.  


There was a layer of drywall, a layer of insulation, an insulation fabric, and then the siding of the house that we had to get through.


Using the pilot hole, Alan drilled out a 6-inch hole with the hole saw from outside of the house.


Next, he used the dremmel to fix the edges of the circle that didn't come out perfectly.


We removed the insulation fabric with a razor blade and our opening was complete!


Step 4: Secure the ducting.

Once our hole was made, it was time to secure the ducting.  We fitted the metal together to form a circle.


Next, we worked to fit it into the exterior opening and through the cabinet.  


This part took a little time because we had to made slight adjustments in the opening to fit the ducting.

Once the opening was cut to the right size, we fit a duct clamp to secure the 6-inch ducting to the elbow that was attached to the stove.


Step 5: Attach the damper wall vent.

We were almost done!  The final step was to secure the damper wall vent vent onto the ducting from the exterior wall and covered the edges of the hole.  The cover has a flap that only opens when air from the inside pushes it out, so it will keep out unwanted critters and dirt.  We screwed this into the wall and then it was secured.


After that, we were done installing the vent!  We are all set to remove the vent hood above the stove and open up the bar to the rest of the kitchen!  But first, dinner.


We have more kitchen projects on the way.  Stay tuned to see how we ripped out our furdowns!