Thursday, July 9, 2015

Post 30: Half Bath Finishing Up

In case you needed a reminder, here's where we left off last time with our half bath "remodel".

This time, we are finishing up the room and getting ready for our big reveal!

Phase 4: Finishing Up

Patching Holes and Seams
To get us ready for paint, Alan used caulk to fill in the seams where the paneling came together and then we went back and patched all of the nail holes with caulk or wood putty.


Once this all dried, we took sandpaper and sanded over each area so that the paint would look smooth over the holes.

Painting
Since the molding was stained wood, I used sander/deglosser over all of it before I started painting.  I just poured some on an old rag and wiped the molding down -- simple as that!


Then, I got to work taping and prepping the room for a coat of paint.
To help everything "stick" to the molding, I painted a coat of Kilz 2 over the wood trim.  
Once this dried, I used semi-gloss paint and primer in Sherwin Williams Alabaster (in Behr) to paint the baseboards and the molding around the door.

Next, I taped the baseboard and around the door and cut in the walls with the same paint in satin.  I finished up by going back with a roller brush to get the large parts of the walls and ceiling.

The mirror I had (a Goodwill purchase) wasn't quite what I wanted for the space, so I used some of the semi-gloss paint to make it blend right in!

Here's a glimpse of our progress so far...  I'm so excited!!!  Okay... I know it's pretty simple right now, but wait until you see the finished room!
Shelves
Alan built some really great farmhouse-y shelves to add some storage to the bathroom.  This was an interesting project for me because he showed me how to use a planer.

Alan's work was getting rid of some lumber and instead of throwing it away, they let Alan take it home.  He decided that these would make perfect shelves for our half bath.
Using his table saw, Alan trimmed three boards to a ten-inch width.    
After this, he set up his planer.  A planer is a machine that removes the rough/excess surface from a board.  Alan explained that one pass did the work of an hour or more of sanding.  It looks like this:
Once the boards were planed, Alan sanded them a little bit to make them really smooth.  Then he applied stain and polyurethane.

We chose to mount the shelves with L-brackets.  I really liked this look from 7th House on the Left, but we priced the plumbing parts we would need and decided the L-brackets would be much more cost-effective.  


I spray painted the brackets bronze to match the rest of our hardware in the house.


Next, it was time to mount the shelves.  Originally, we thought we wanted three shelves, but when we started measuring where they would hang, we decided two would look less crowded and give us more vertical space to store things.

Alan used a stud finder to figure out where to hang the brackets and then we mounted the shelves.

So, to recap, in our half bath, we have 
  • removed our furdown
  • added (and updated) a mirror
  • improved the lighting in the room
  • installed paneling over our stubborn wallpaper
  • brightened the room with paint
  • and built shelving for more storage and a farmhouse look.
Click here to check out our big reveal!!

Wednesday, July 1, 2015

Post 38: Chandelier

Today, we are talking about brightening up our breakfast nook.  This really easy chandelier DIY was a fun addition to our space that added some style, light, and didn't dig into our budget.


When we moved in, our breakfast area was lit by this ceiling fan.  It's a pretty nice fan and I think it would look great in a sun room or a larger space, but I'm not crazy about it in this space.  It's not quite as bright as I would like and I would prefer to have a chandelier or another non-fan light fixture over our table.


You can tell that when the fan was installed, the owners had to move it farther away from the window than the previous fixture so that the blades wouldn't hit the furdown above the windows.  It's just really not the pretty statement piece I would like.


I've been watching a lot of Fixer Upper, and it's made me really want a painted chandelier to go over the kitchen table.  Below are some pictures of what I had in mind.


With a price tag starting at $650, though, I wasn't too happy (average price at Magnolia Market, Lowes, and Home Depot at the time I first started looking).  I was sure I could replicate something for a much better price.

I have seen similar light fixtures in brass or nickel finishes on Craigslist before, so I figured I could snag one and paint it for a fun DIY.  After looking online for a grand total of TWO MINUTES, I found this one listed for a whopping $20.  We can afford that.  What's even better is that the seller decided to give it to us for free!!  (I'm not sure if she was just feeling generous or our project clothes made us look like we couldn't afford to spare $20, but she blessed us and we are so grateful!)


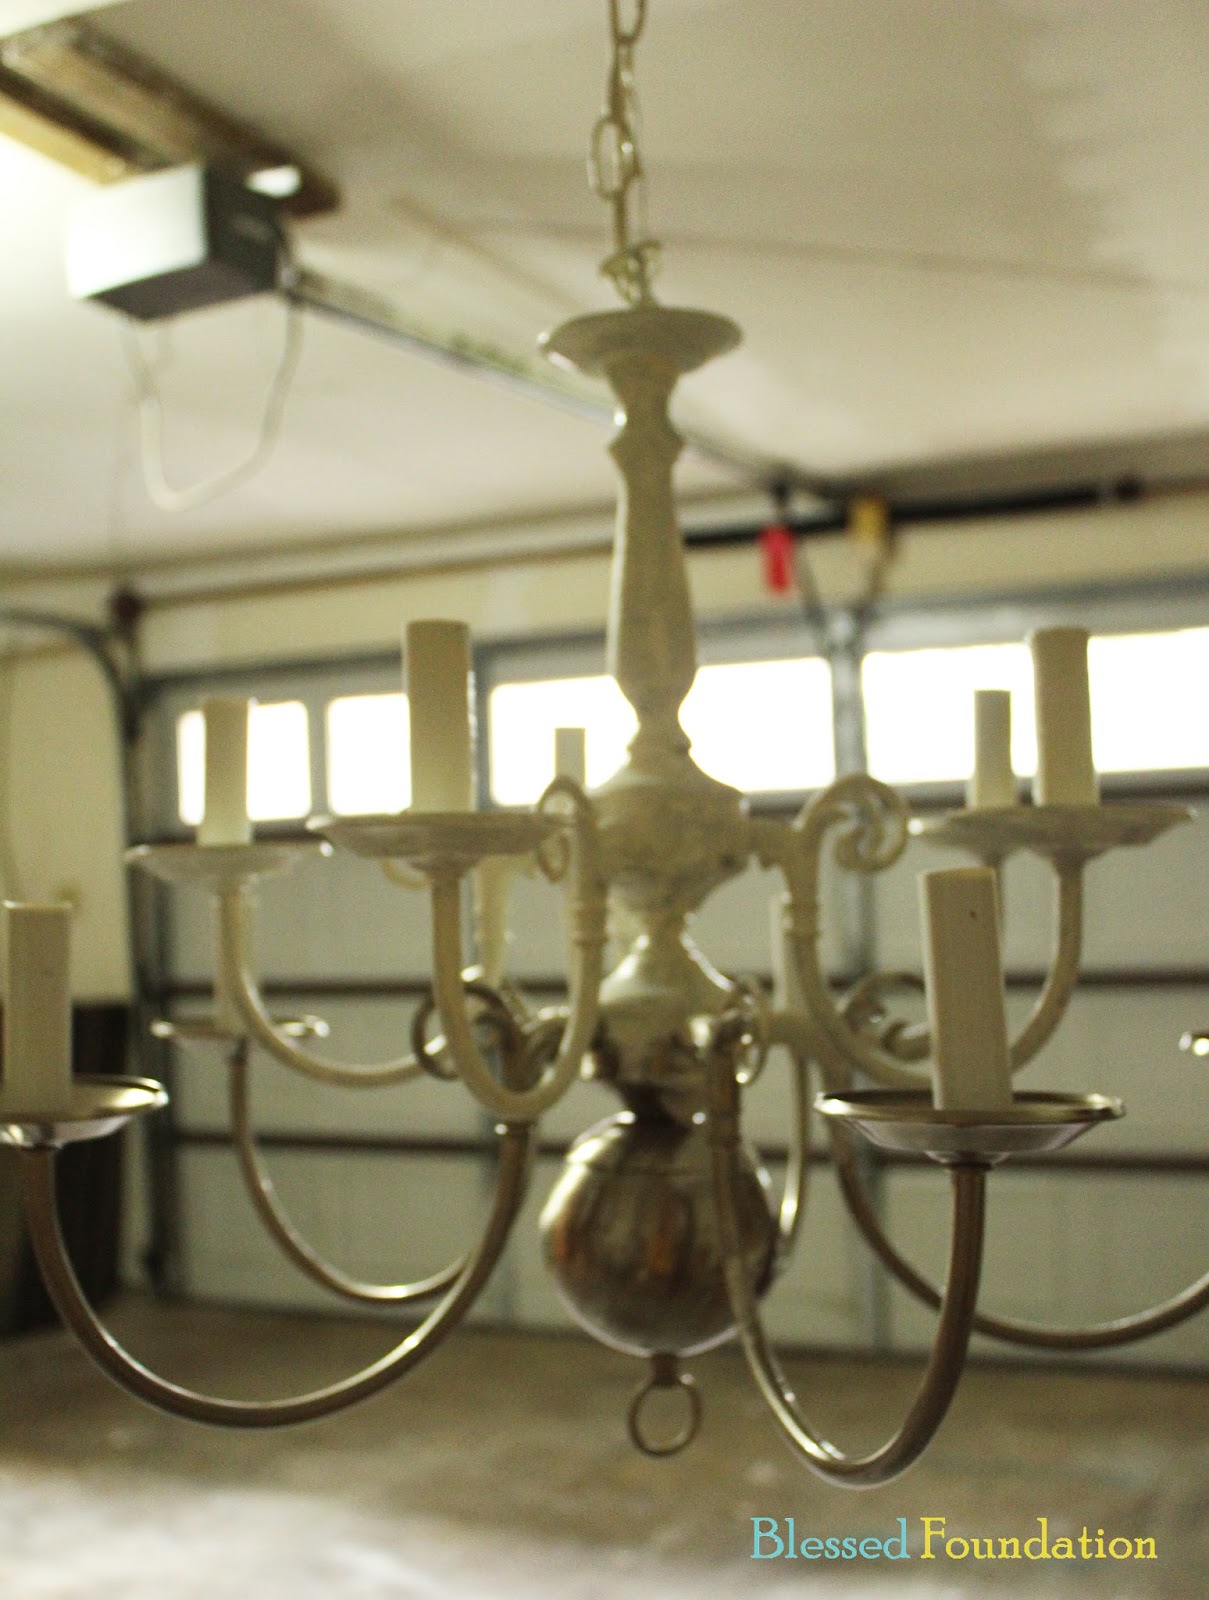
It didn't take long to get this project going.  Alan used a small hook screwed into a stud to hang the chandelier in the garage for me to paint.  I secured the extra wires out of the way with some painters tape and I was ready to get started.


Remember our dining room table project when I experimented with chalk paint?  (That table has since been moved to our kitchen.)  When I was reading every blog I could find that talked about chalk paint, I was amazed at the range of surfaces people use the stuff on.  One that stuck out to me in particular was -- you guessed it -- chandeliers!  I like the texture it leaves and since 1.) it will perfectly coordinate with the table in the kitchen and 2.) I have a ton of the stuff left over from the table project, I decided it was the perfect paint for the project.


This project was pretty straight forward.  I just started painting at the top and worked my way down.


This was after the first coat of paint.  I was pretty sure that two coats would be perfect.  I let this one dry overnight before applying the next coat.


Here is the chandelier after the second coat went on.  I went ahead and painted the candle tubes with the chalk paint as well because the white plastic against the color of the chalk paint was a little gross (Old White is closer to a cream color with a little hint of yellow).


This turned out to be a pretty inexpensive project.  Here was the break down:
  • Chandelier: free
  • Chalk paint: left over (originally, $37.  I had half a can left and I barely made a dent in it for this project)
  • Candelabra lights: $12 for 10 bulbs
Total: I "guesstimate" less than $20 total!  Not bad for a chandelier!  Now to get rid of that pesky fan...


We were able to sell the fan on Facebook for $70.  So, I'd say we really profited on this project!

I couldn't wait to get this up in place of that ceiling fan -- it fits the space so much better.  I'm already liking the room more!


On to more kitchen projects (we're gonna be here a little while longer!).  Check out our painted kitchen cabinet tutorial!


Monday, June 29, 2015

Post 29: Half Bath Paneling and Molding

Last time, we showed you how we re-installed our can lights and air vent and then put up new drywall on the ceiling and where the furdown used to be.  


This time, we are talking about paneling and molding installation.

Phase 3: Paneling and Molding

Here's a reminder of the inspiration for this space.


I really wanted a farmhouse feel with clean, white lines.  To achieve this, we decided to install paneling on the walls and ceiling of the bathroom and paint everything white.  (Don't worry, we will add other colorful pieces to the room to avoid a "sterile" feel!)

Removing Baseboards
To install the paneling, first we needed to remove the baseboards so that we could hide the edges of the boards.  While Alan was on a Home Depot run, I decided to try to try my hand at removing them.  There were two pieces that made up the baseboard along each wall -- the baseboard itself and a piece of quarter round at the floor.  I started with the quarter round on all four walls and then went back to remove the baseboards.


I used the crowbar and the hammer to pry each piece away from the wall and worked slowly so I wouldn't mess up the molding.  This took me about 30 minutes and I got to surprise Alan when he got home with one less step of the project to go!


Installing Paneling
I found sheets of paneling at Home Depot for about $18 a sheet.  We needed about 5 for the whole room, so we bought those and corner molding for the ceiling and walls.


We started with the ceiling this time since that seemed to be the hardest section in the drywall phase.  The paneling needed to be cut in one piece, so that didn't leave us much room for error.  We needed to get everything pretty snug along the sides and cut the light and vent holes close enough that all of the edges would be covered up.  My parents had a really good idea to use posterboard and make a template of the ceiling.  We bought a pack of 10 posters from Walmart and they worked great!


We used painters tape and then duct tape (so it would stay together better) to cover the ceiling with posters, cutting out holes for the lights and the air vent with a razor blade as we went.  Once the ceiling was covered and we felt we had a good template, we took the giant posterboard down and used it as a stencil on the paneling.


I marked out where we needed to cut the paneling and then we cut out the ceiling piece with a jigsaw. 


Once we had cut out the holes in the paneling, we were ready to install it on the ceiling. 

Warning/tip: working with giant sheets of paneling/drywall/wood/whatever in a small space can be really frustrating!  It can be difficult to maneuver everything to get it in the right place when there isn't much wiggle room, and sometimes, things get stuck or wedged and they are really hard to get back out.  Alan and I have done a few projects together now, so we knew that holding things above our heads can be really tiring already, so adding in the tight squeeze, we knew we had a mess coming our way!  We decided before we took the paneling into the house that it was us against the board.  Any other way, and we both lose!  It was still frustrating, and we pinched a few fingers in the process, but I'm really glad that we decided to laugh together when the situation started to seem impossible!

We ended up cutting the piece a little too long and we couldn't get it up to the ceiling at first, but that was definitely better than cutting it too small and having to buy a new piece of paneling!  


For the ceiling, we tried nailing the paneling to the drywall, but it started to fall down.  We had to find the studs and nail it in along those for added security.  

The panel was actually just a few inches too narrow to cover our ceiling (the sheets only come four feet wide), so we cut another strip from an extra piece to fill in the remaining gap.  This was the key when we had to piece the paneling together.  We cut it along a groove so that it would look more seamless once two pieces were butt up next to each other.


Once the ceiling was done, we measured each of the walls and pieced the paneling together to cover the room (remembering to cut along the grooves when we pieced the paneling together).  Generally, Alan nailed the paneling to the walls along the far edges of each piece so that most of the holes would be covered by molding.  


Where there were outlets in the walls, we measured where to cut the hole in the paneling and drew it like a stencil before cutting the piece.  We just made sure the holes were small enough that the outlet covers would conceal the edges.


When there was plumbing, we put the paneling on in multiple pieces around the plumbing, cutting along the groove of the paneling to make it easier to fit together and hide the seams.  (This picture is blurry, but you can see the seams around the plumbing.  We just used caulk later on to hide the gaps.)


Installing Molding
I already loved the way the paneling looked.  It was so much brighter than the wallpaper!  The edges didn't come together perfectly, though, so it was time to cover the seams with molding.  


We bought scotia molding (basically, concave quarter round) to cover up the corners of the room.


We started with the ceiling, cutting the molding at 45-50 degree angles depending on each corner and nailing each piece up against the ceiling.


Note: I've seen a lot of beadboard/paneling ceilings done with much wider molding around the edges than what we did (see the House of Smith's tutorial link below).


I think that would have been much easier because then we could have cut the paneling for the ceiling smaller and had a lot more wiggle room.  The problem that we ran into was that our vent was too close to the edge of the wall (see picture below) and we didn't have a wide enough space for very much molding.  We chose to use the quarter inch molding instead for this reason.


Unfortunately, with how close the vent cover was to the edge of the room, even the molding we chose wouldn't quite fit around the vent cover.  We had to get a little creative with how we cut the piece that went along this edge.  Here are the steps we took to cut the molding to fit around the vent cover:

  1. Take measurements.  We measured where on the molding the vent was (left to right) and then how far from the vent sat on the ceiling.  We made a mark on the molding to show where we needed to cut (left to right).
  2. Mark.  We turned the molding over and measured from the 90-degree corner and made a mark (using the measurement of how far the vent was from the corner of the ceiling).
  3. Cut.  Using a jigsaw, we cut out the part of the molding that would make room for the vent cover.


Voila!  No more issues.


Next, we reinstalled the baseboards.  Since the paneling added an extra width to the walls, we had to cut down some of the baseboards about a quarter of an inch to fit within the room.  We nailed the main pieces first and then went back and added the quarter round.


Finally, we cut molding to run vertically in each corner and nailed each piece into place.


So that's the room just about ready for paint!  Remember where we started?


Stop by later to see us put on the finishing touches!